User Interface Settings
Overview
The Mythradon User Interface Settings allow you to make changes to the following:
- Application Logo
- Application Name
- Themes
- Menu Items
- Quick Create Menu Items
- Default Dashboard Layouts
To change the User Interface Setting:
- Select
Administration | User Interfacefrom the Menu Button - Edit the fields as necessary
- Click the
Savebutton
Note: Upon making changes, the application should refresh automatically and apply them. In case the changes are not reflected, you can try logging out and logging back in or pressing
Ctrl+F5to refresh the browser.
The following properties can be configured:
| Property | Description |
|---|---|
| CONFIGURATION | |
| Company Logo | Company Logo displayed on the Login Page and the Main Menu |
| Theme | Application Theme controls the colours and menu style used in the application |
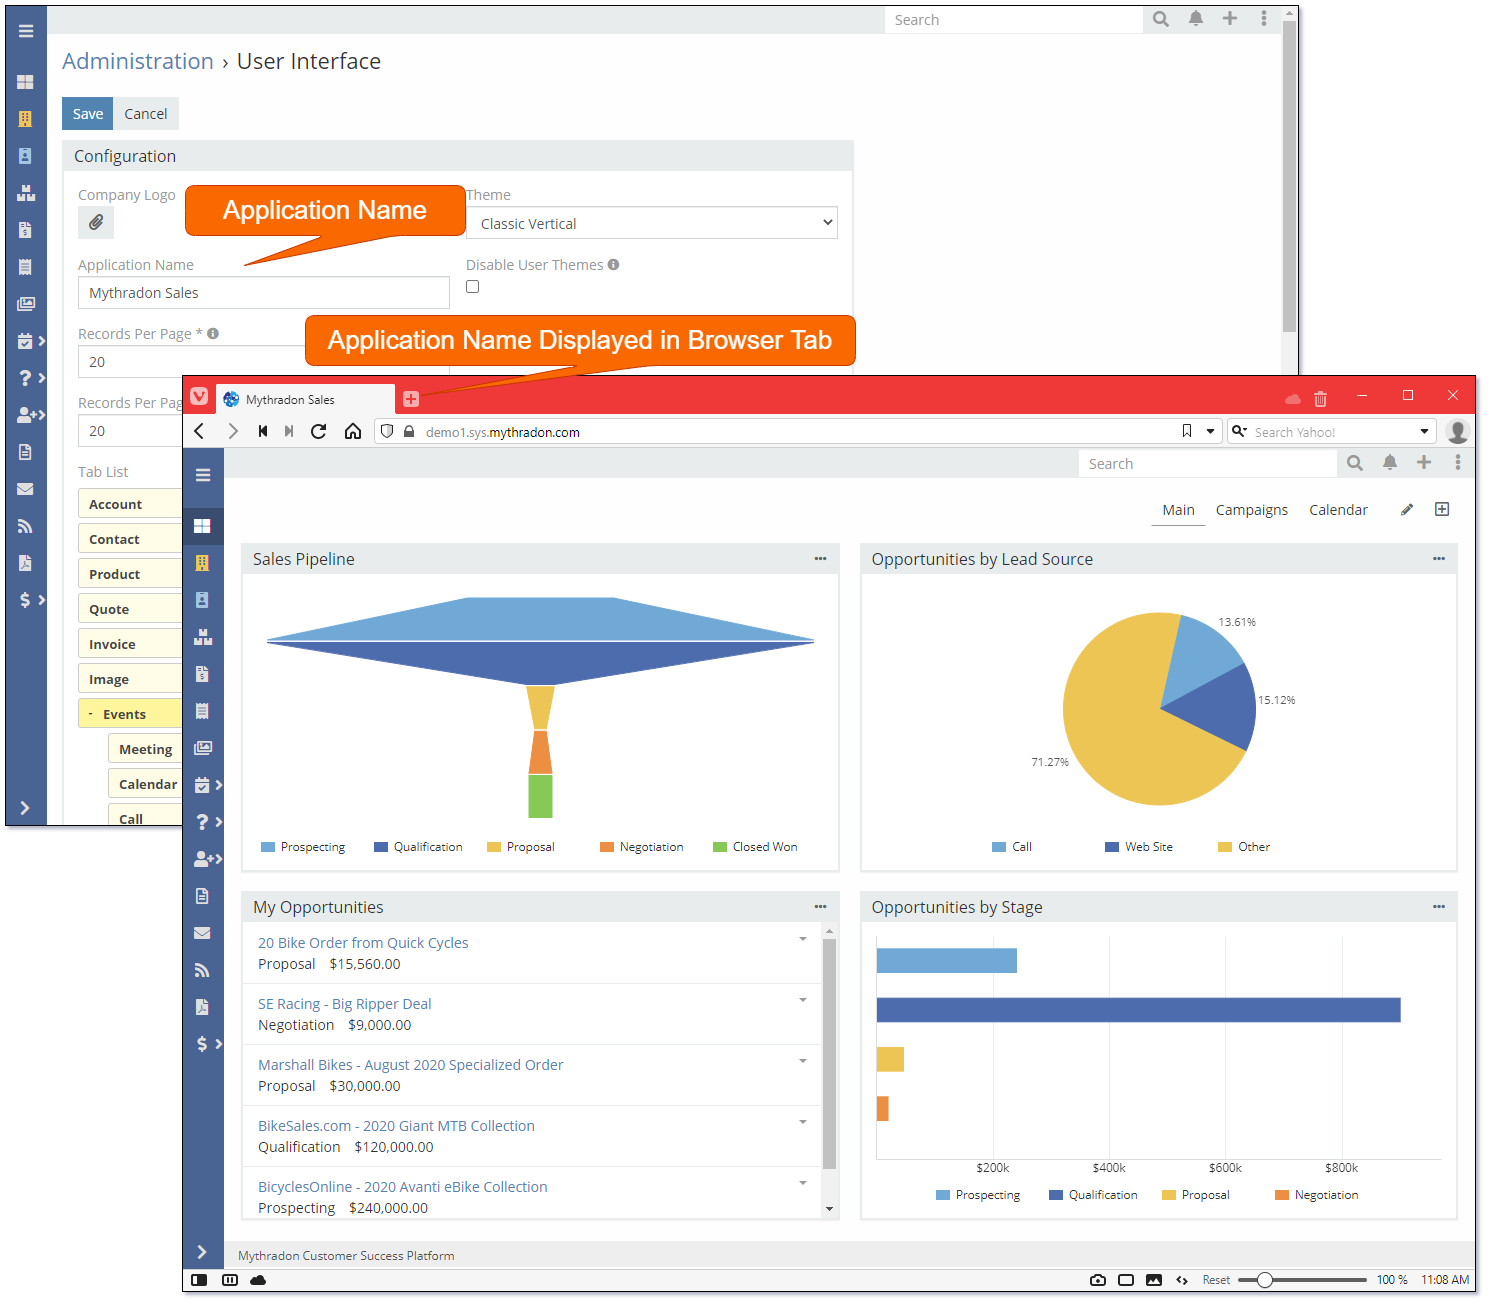
| Application Name | Application Name allows you to change the Application Name displayed in the Browser Tab |
| Disable User Themes | Controls if Users can select their own theme |
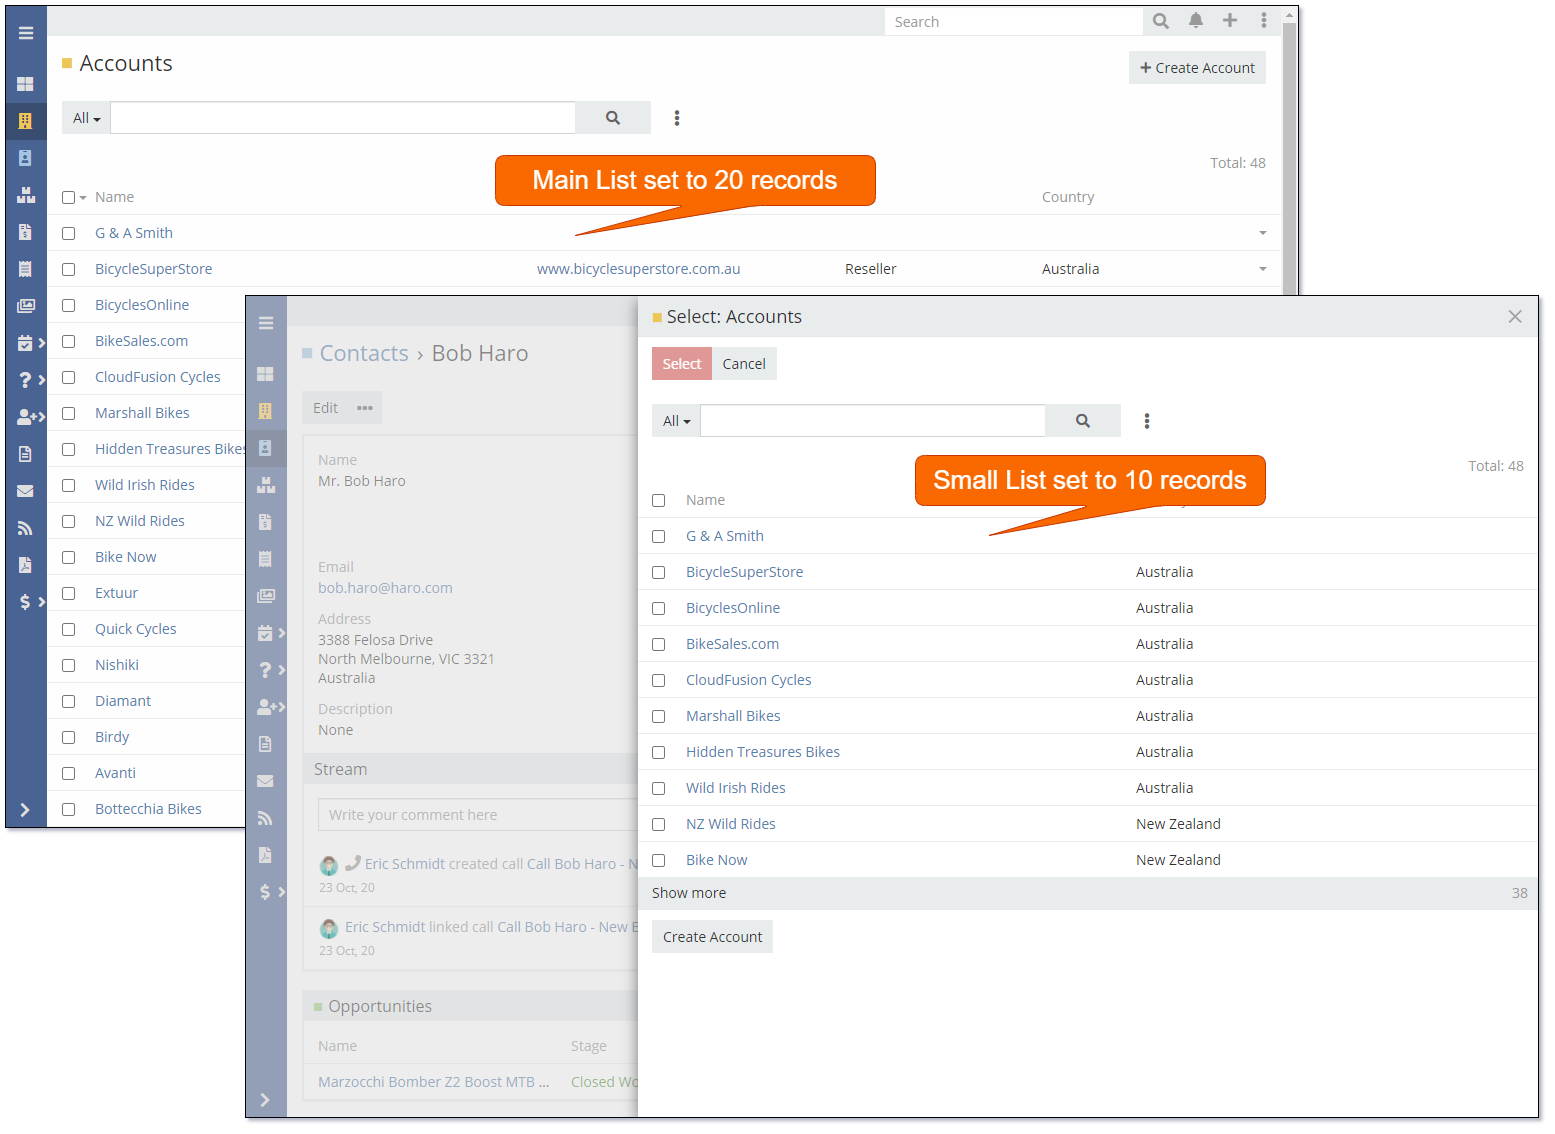
| Records Per Page | Records Per Page controls the number of records initially displayed in list views. Default is 20 records |
| Display Total Count (on List View) | Controls if the total number of records available for a list is displayed at the top of the list |
| Records Per Page (Small) | Records Per Page (Small) controls the number of records initially displayed in relationship panels. Default is 5 records |
| Disable Avatars | Disable AvatarsControls if Avatar images are displayed on User selection lists |
| Records Per Page (Select) | Records Per Page (Select) controls the number of records initially displayed in selection dialogs. Default is 10 records |
| Tab List | Tab List controls the tabs/items that are displayed on the Main Menu |
| Quick Create List | Quick Create List controls the items that are available in the Quick Create Menu |
| Disable Scope Colours | Enable/disable the colours being displayed on the menu item/tab icons |
| Disable Tab Colours | Enable/disable the colours being displayed on the menu item/tab icons |
| Disable Tab Icons | Enable/disable the display of menu item/tab Icons |
| Dashboard Layout (default) | Dashboard Layout Default allows you to define the default layout for your Home Page dashboards |
Company Logo
The company logo can be setup from the User Interface Settings.
Recommended dimensions: W181 x H43 pixels
![]()
The company logo is displayed in the top right corner of the main menu and also on the application login page.
Application Name
The Application Name can be set to change the name that is displayed in the Browser Page Tab.
Disable User Theme
System Administrators may find it easier to support the system if the end Users are unable to change their menu themes.
If you enable the Disable User Themes option, all users will be required to use the system's default theme settings that are specified in the Theme field on this page.
Records Per Page
Control the number of records displayed on Lists. There are three separate settings for three different types of lists:
- Main Lists - Controls the number of records initially displayed on the home page lists used on most entities such as Account, Contact, Opportunity etc.
- Small Lists - Controls the number of records initially displayed in relationship (Bottom) panels.
- Select Lists - Controls the number of records initially displayed when selecting a related record, such as relating a Contact to an Account.
The three fields to set are:
- Records Per Page - Default size is 20
- Records Per Page (Small) - Default size is 5
- Records Per Page (Select) - Default size is 10
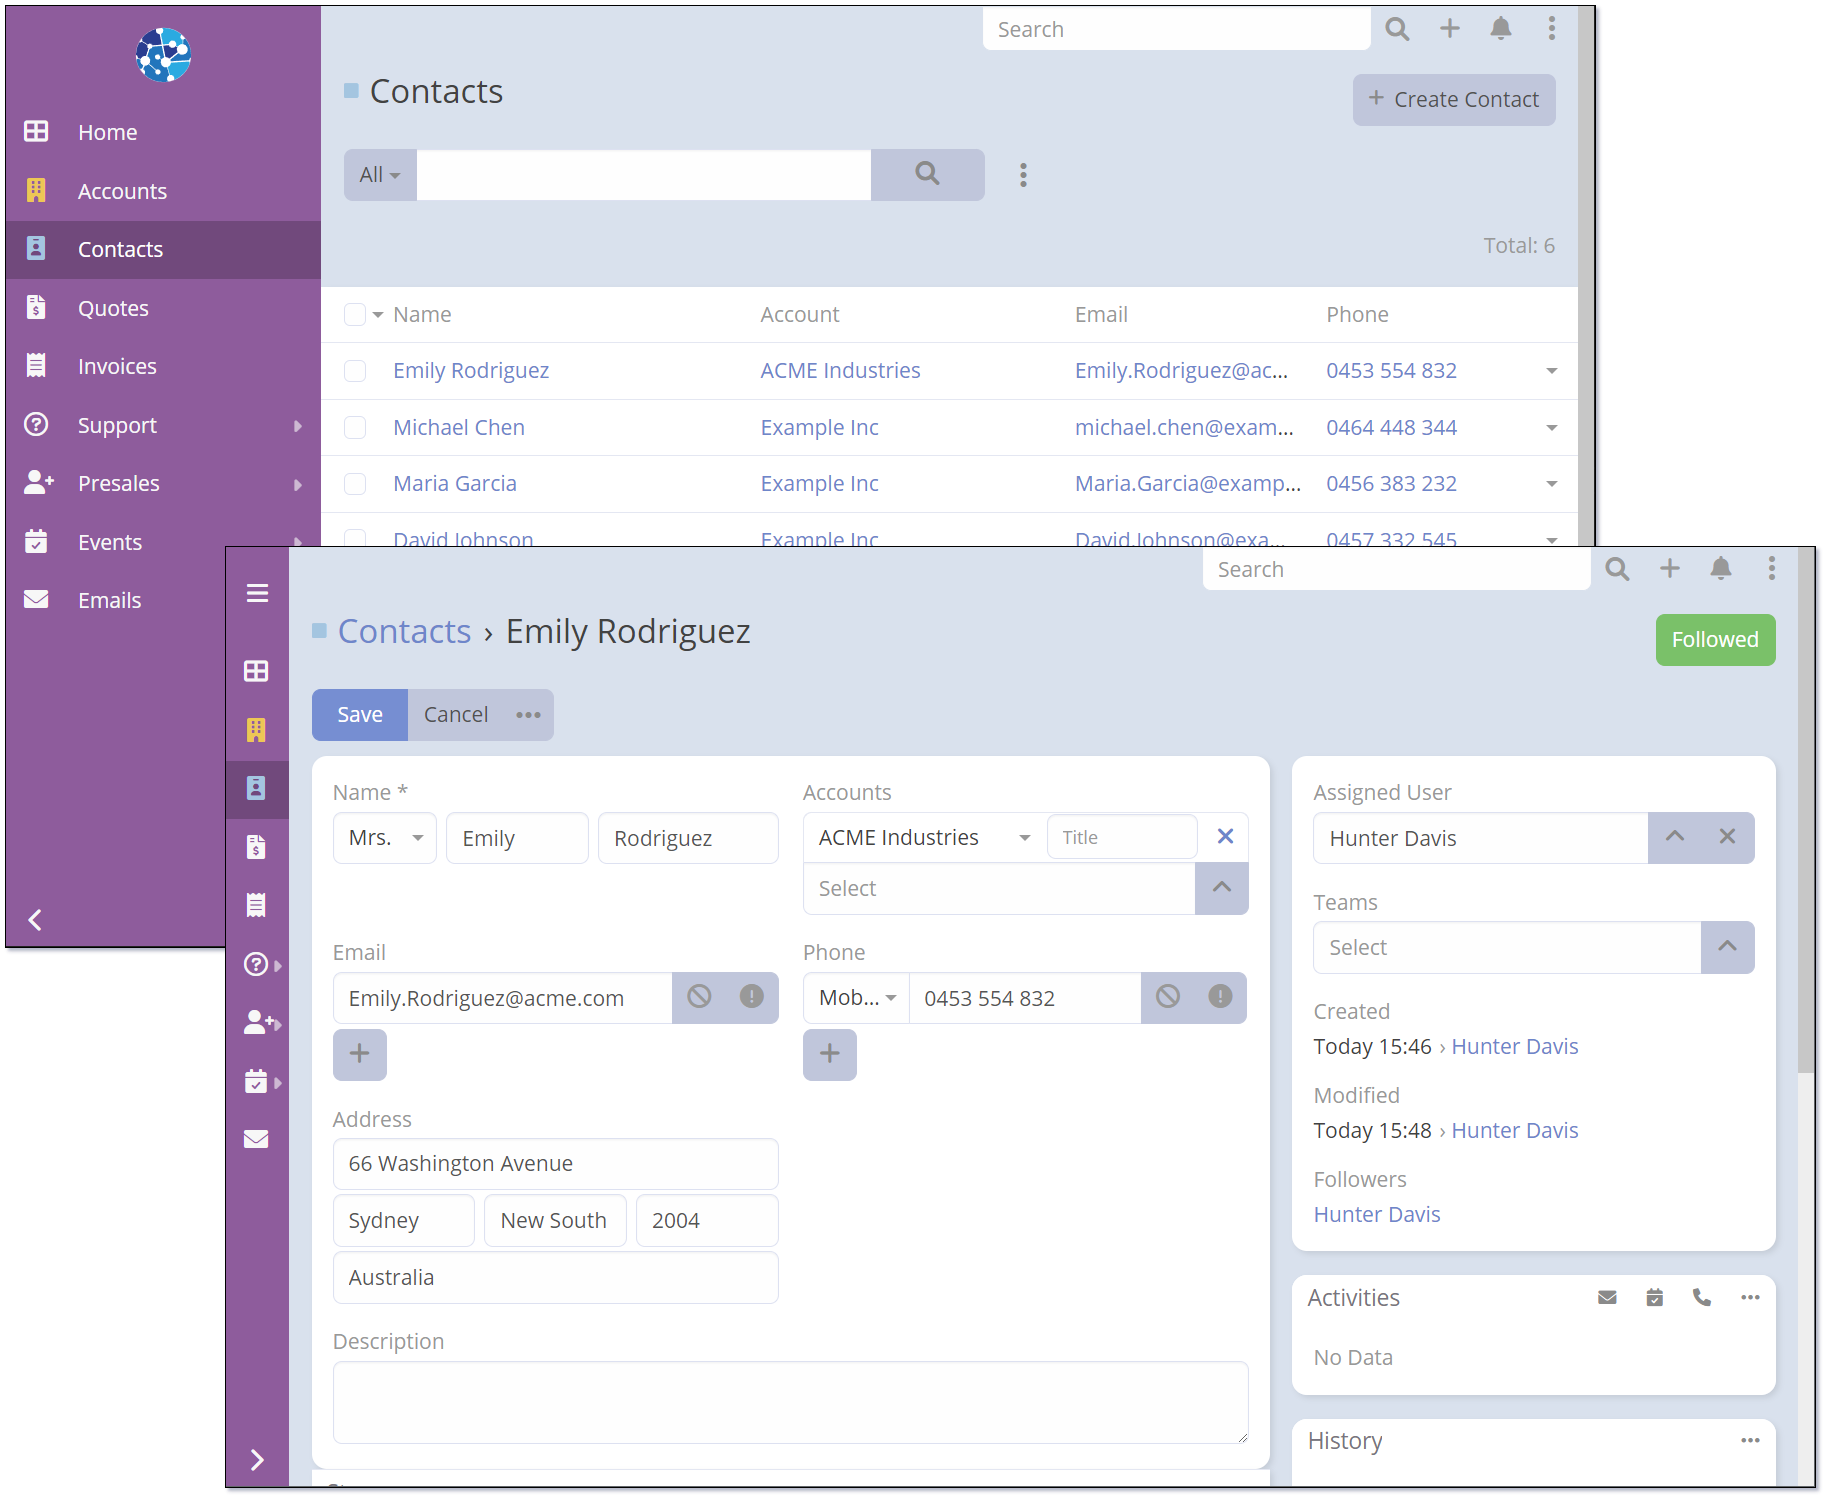
Disable Avatars
The 'Disable Avatars' will control if small avatar icons are displayed against User's when selecting a User from a list. i.e., Assigning an Owner to a record
![]()
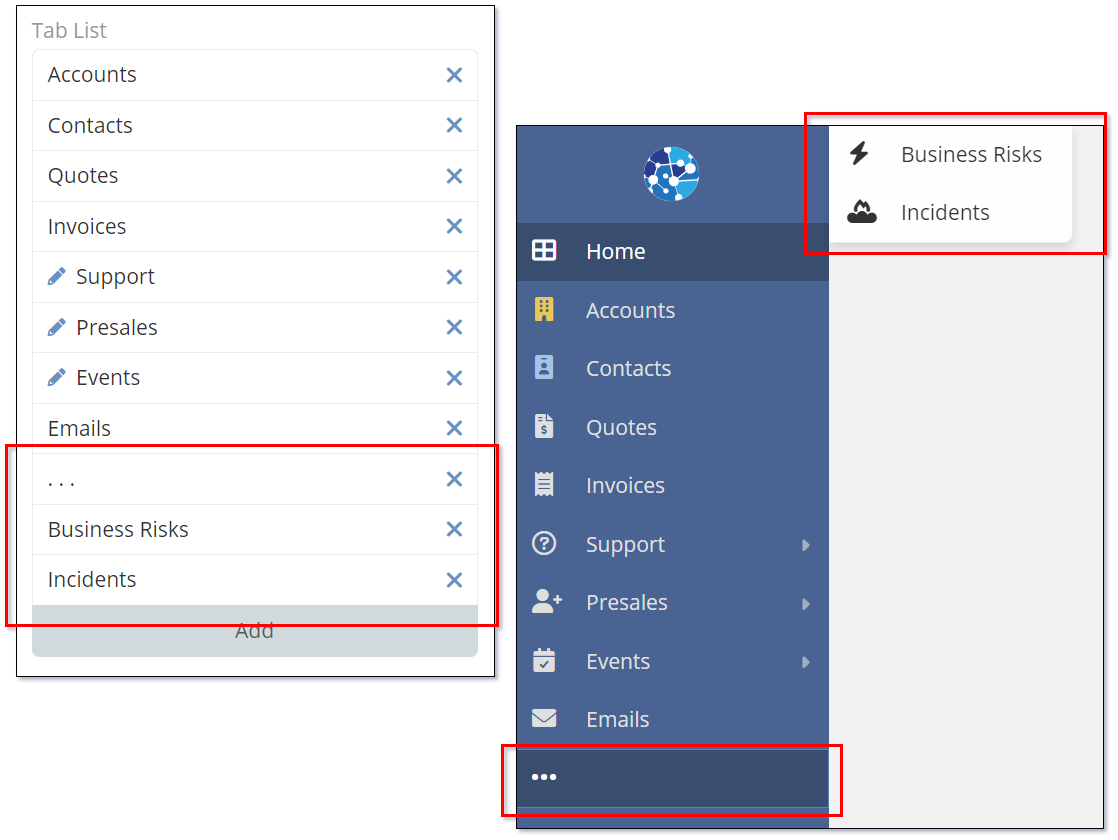
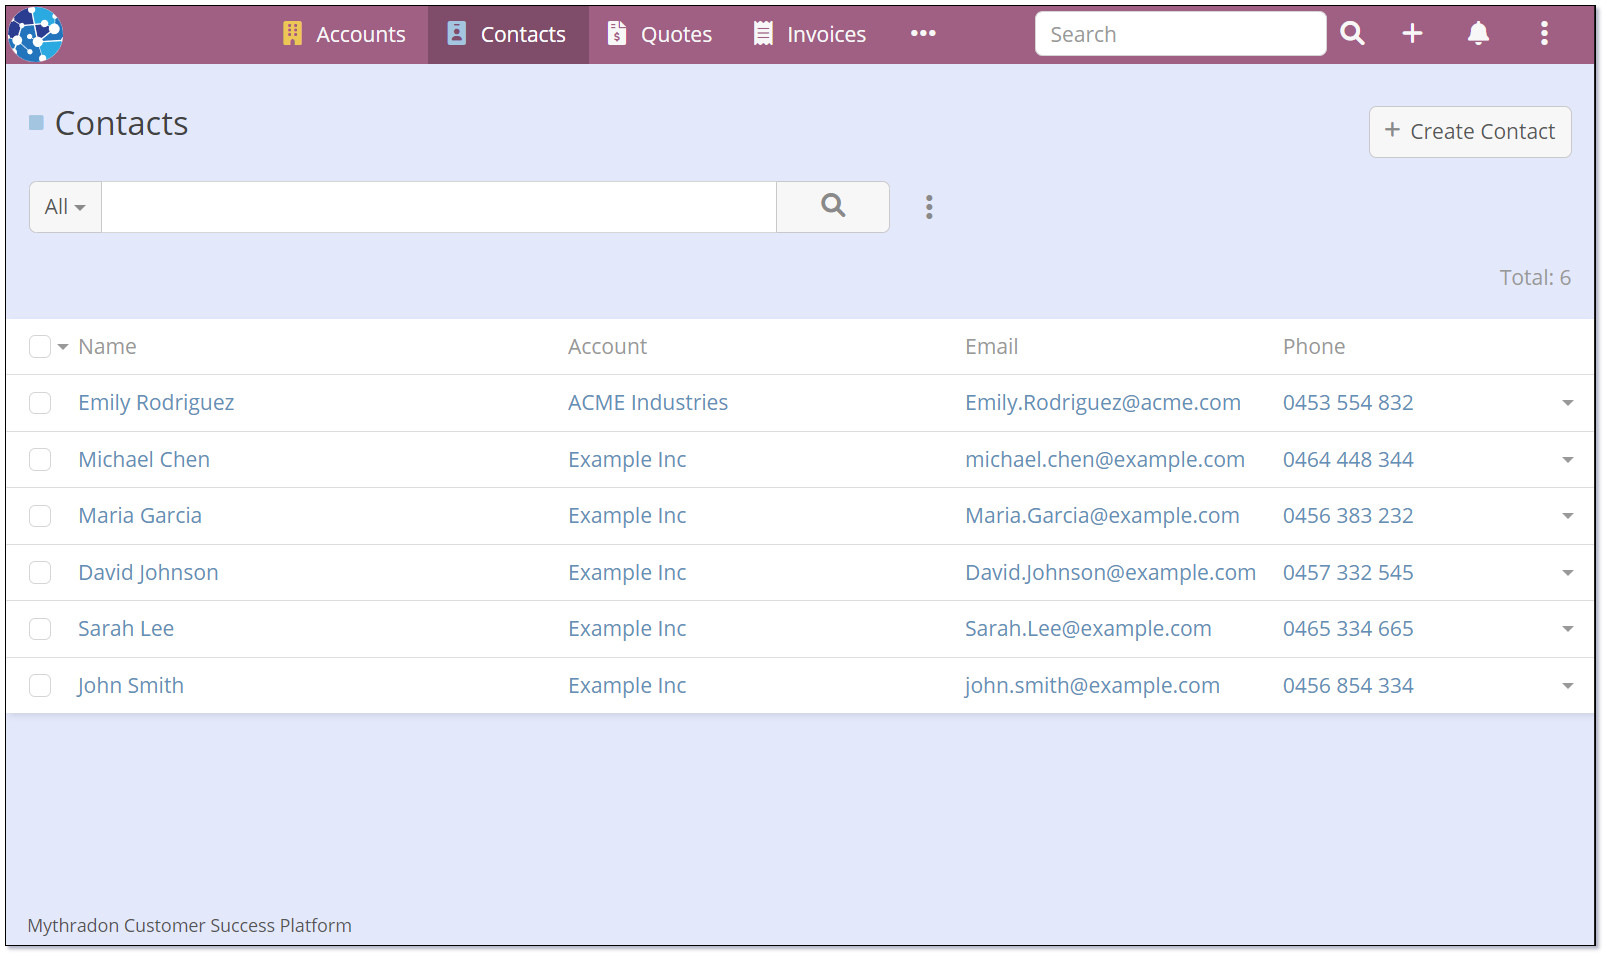
Menu Items
The Tab List controls the tabs/items that are displayed on the Main Menu, regardless of the User's horizonal or vertical menu display preference.
The menu items are referred to as Tabs. The User Interface administration screen allows you to structure the tabs (menu items) as you require.
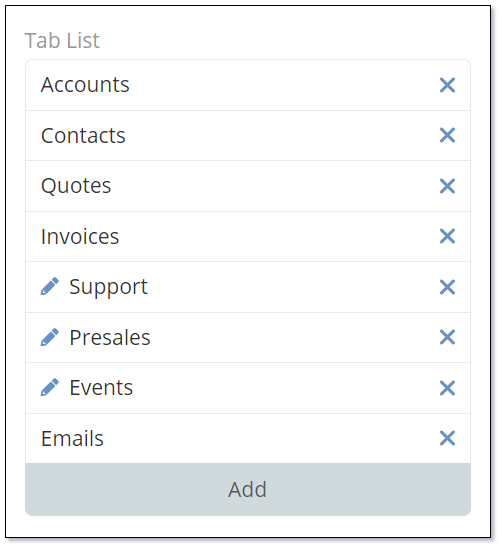
In order to modify the menu:
- Drag and drop the items in the required order
- Use the
Addbutton at the bottom of the list to add new items that may not have been added to the menu- Click the
Group Tabbutton at the top of the list of tabs to create a separate sub-group of tabs
- Click the
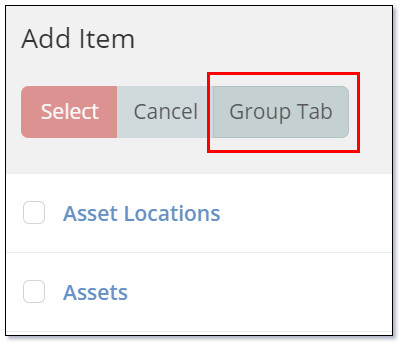
* Select the ... special tab to create a group of tabs that display only when clicked. Similar to the sub-group. (The ... can be selected from the bottom of the list of tabs)
- Click the
Savebutton to commit your changes.
Note: Each user's available menu items are determined by their roles. Merely setting up the menu structure does not guarantee that a user will have access to a particular item. If you cannot find a specific menu item, you should review the user's role settings.
Refer to Mythradon Roles for further information on the visibility of menu items.
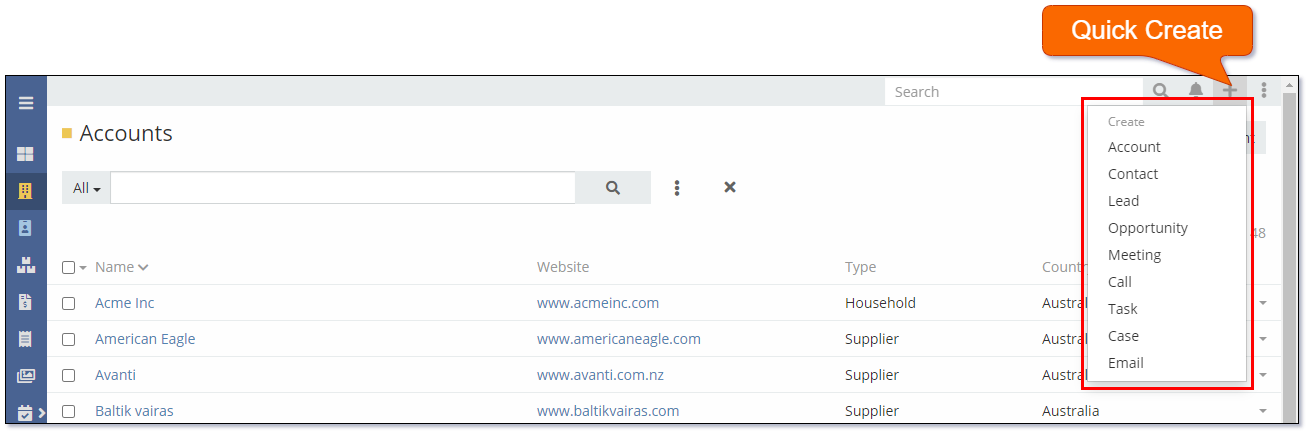
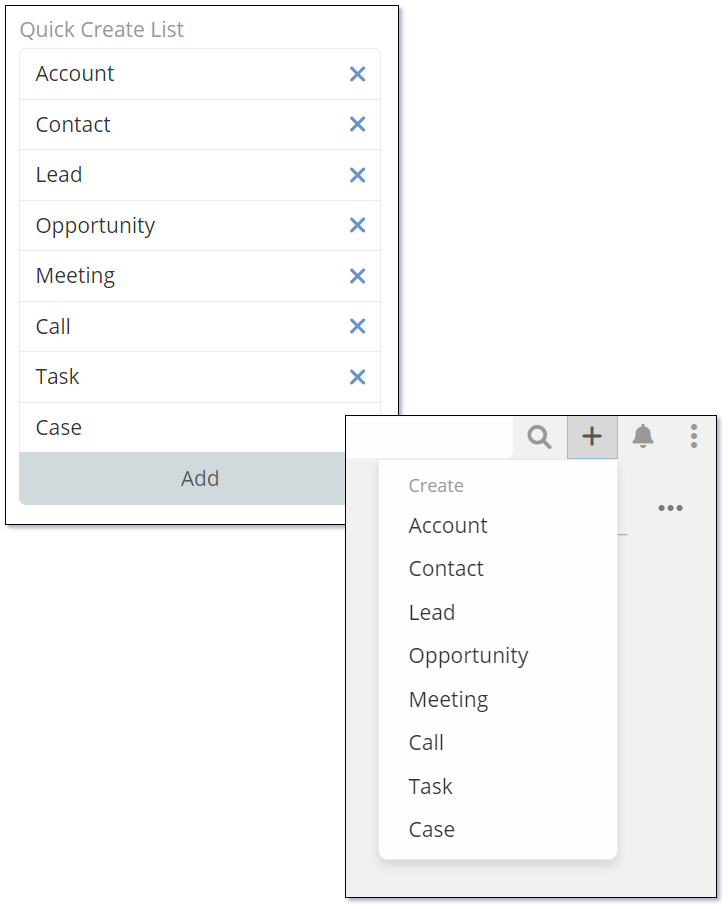
Quick Create Menu Items
With the Quick Create List feature in Mythradon, users can create various items, such as Accounts, Contacts, Leads, Opportunities, Cases, and more, without the need to navigate away from their current page within the application.
- Drag an drop the Menu Items to create the necessary order
- Use the
Addbutton at the bottom of the list to add new items to the Quick Create menu
- Use the
- Click the
Savebutton to commit your changes.
Mythradon Themes
Mythradon supports several different themes that control the colours and the menu position.
Possible themes are:
There are two places where the theme can be changed:
- By the System Administrator - Default Theme Setting
- By each User - Personal Theme Setting
Default Theme Setting
The default theme setting can only be modified by a System Administrator. This is the default theme used by all Users that have not set their own Personal Theme Setting.
- Select
Administration | User Interfacefrom the Menu Button - Choose the theme and navbar position that you prefer as the default, and then click on the
Savebutton.

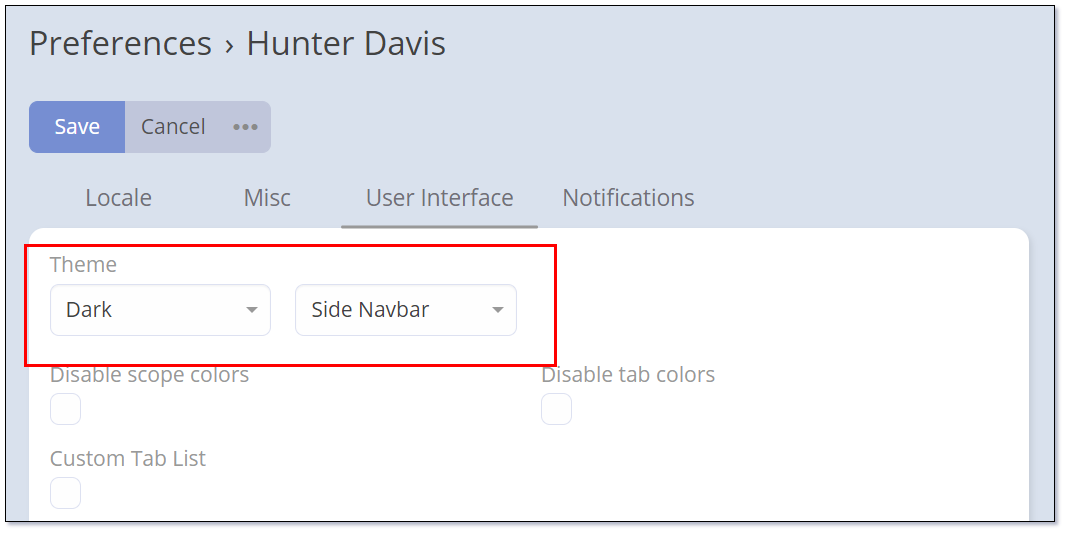
Personal Theme Setting
Each user can override the default theme in their User Profile Settings provided the System Administrator has not set the Disable User Themes.
- Select
Preferencesfrom the Menu Button - Select the
User Interfacetab - Select the theme that you wish to use and press the
Savebutton.
Theme Samples
Here are some examples of the themes that are currently available:
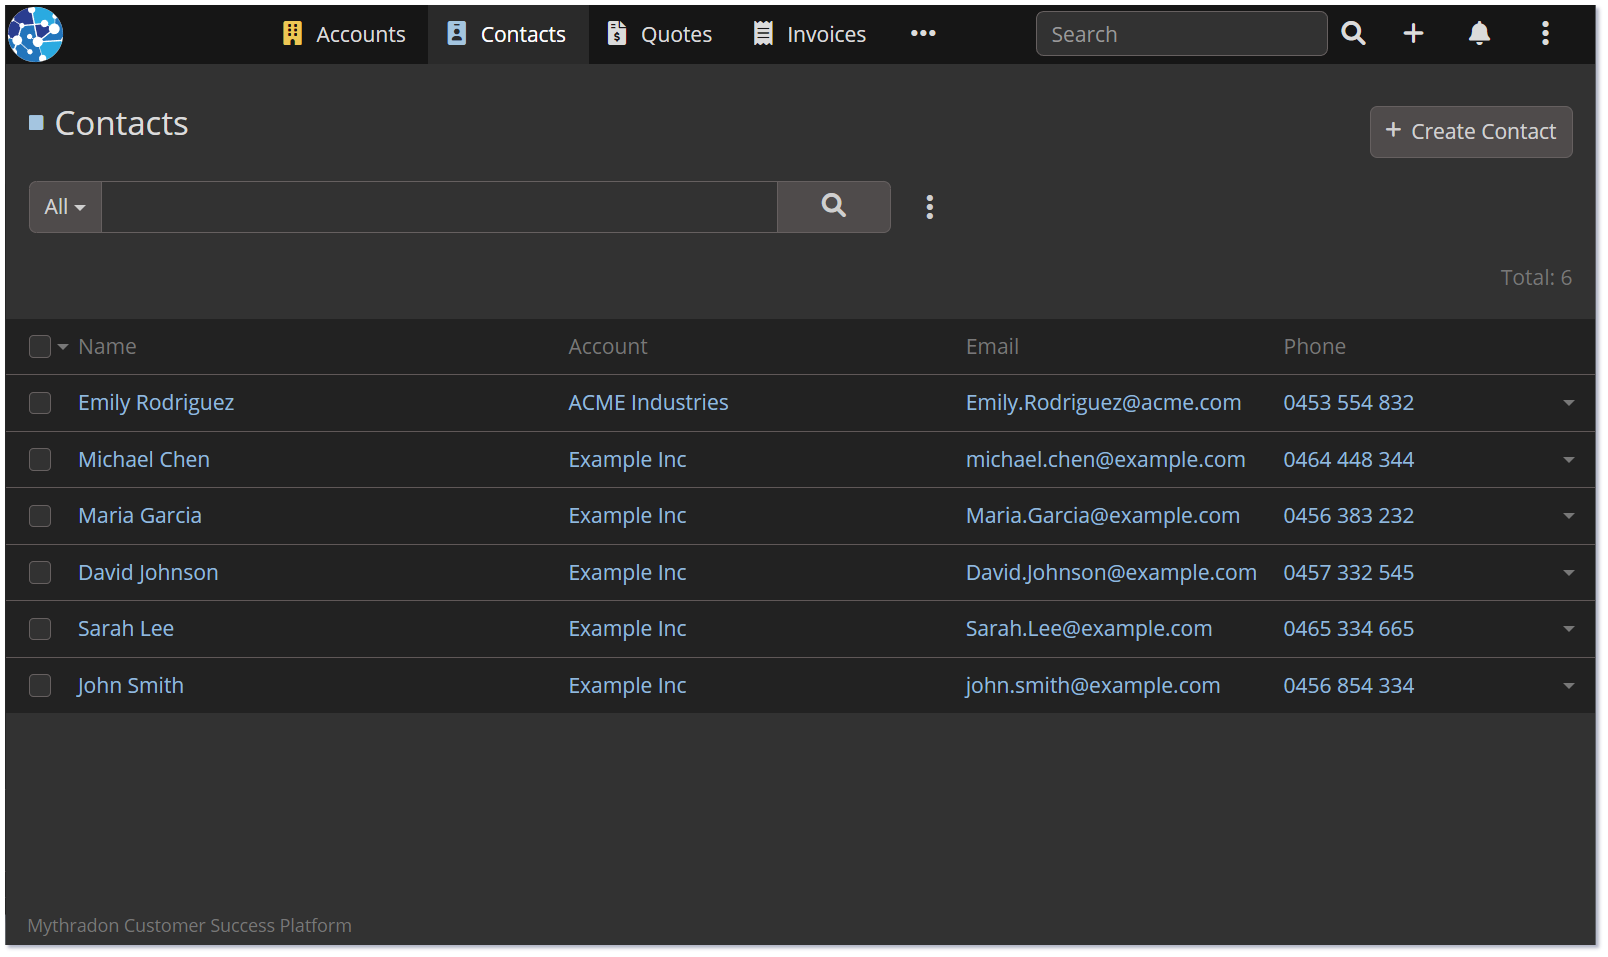
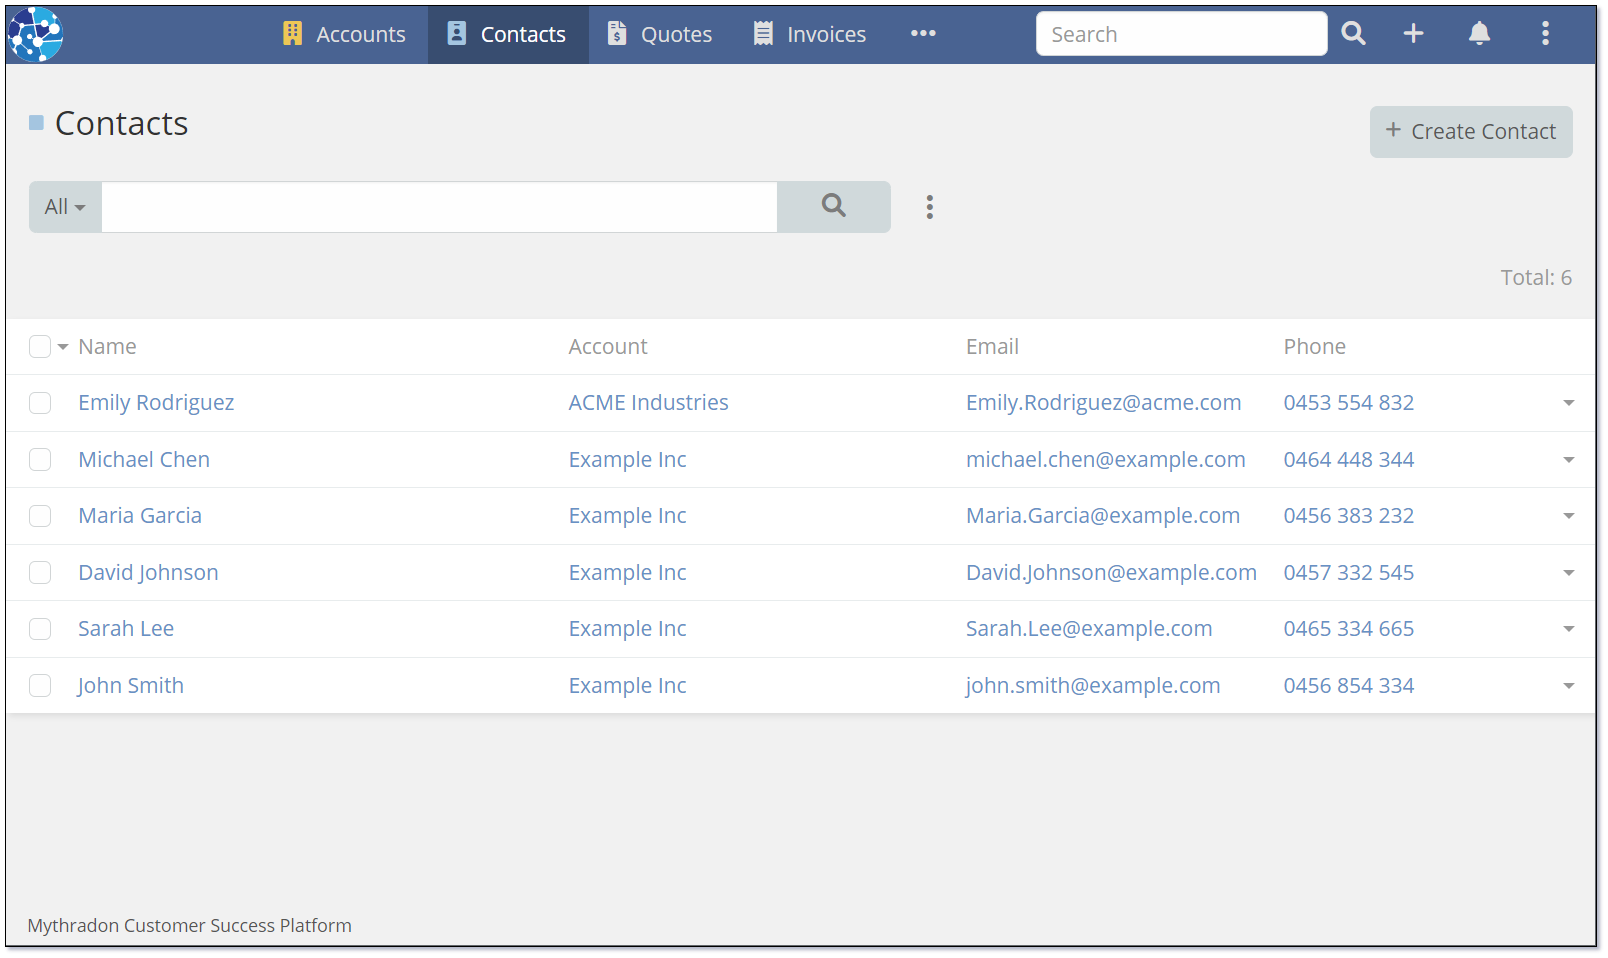
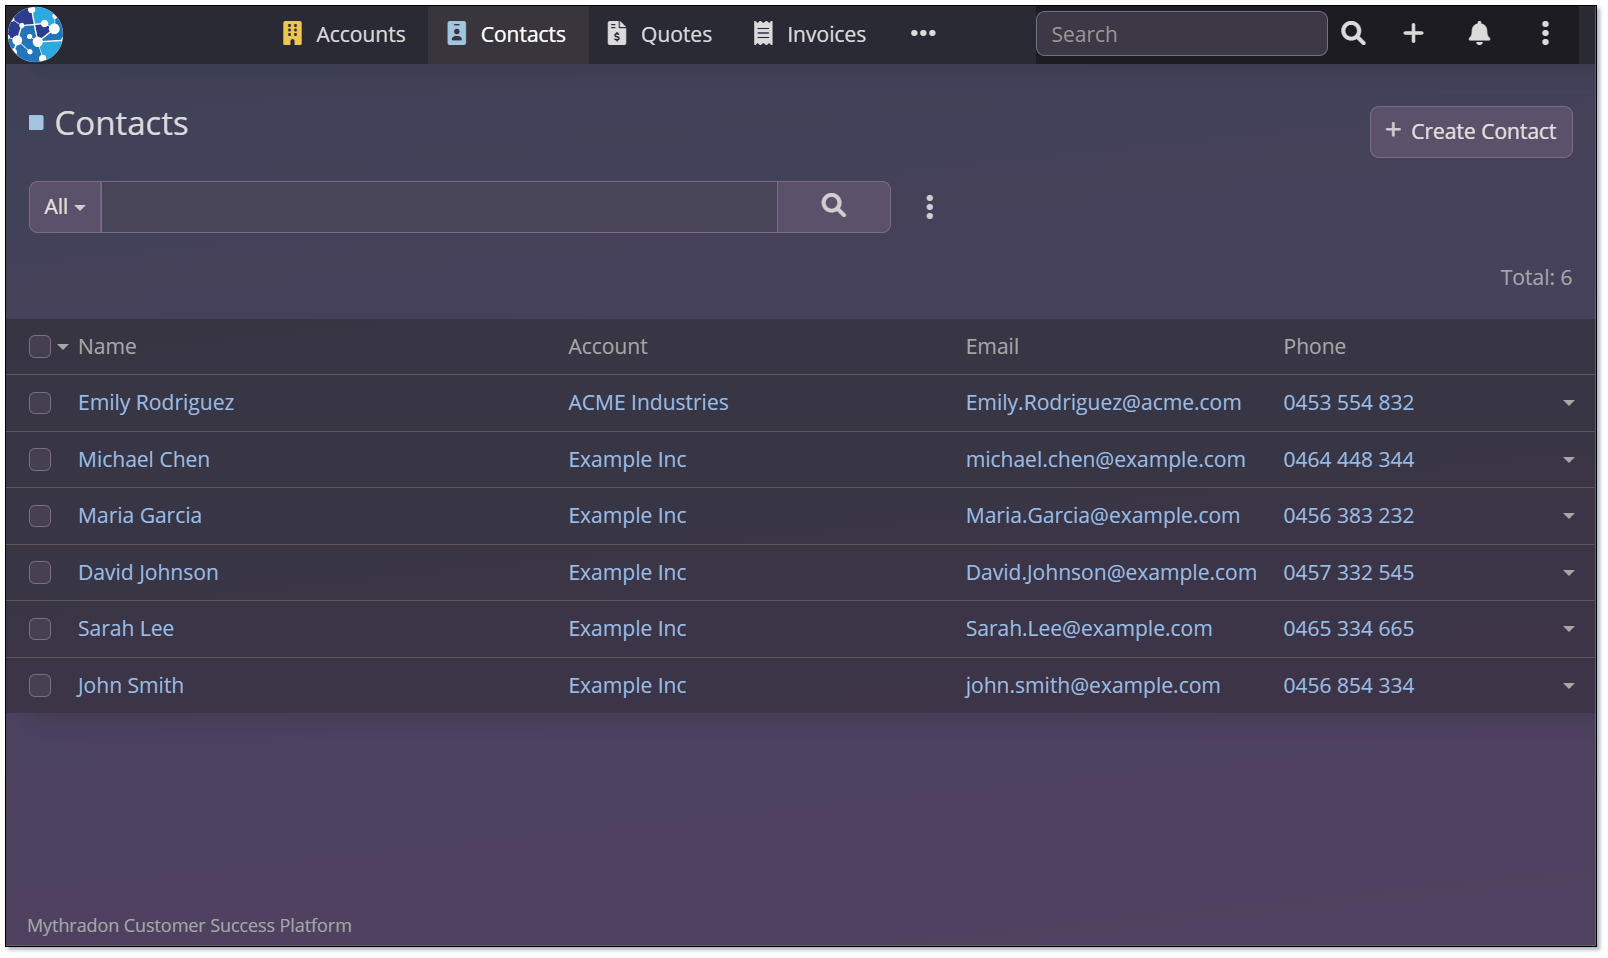
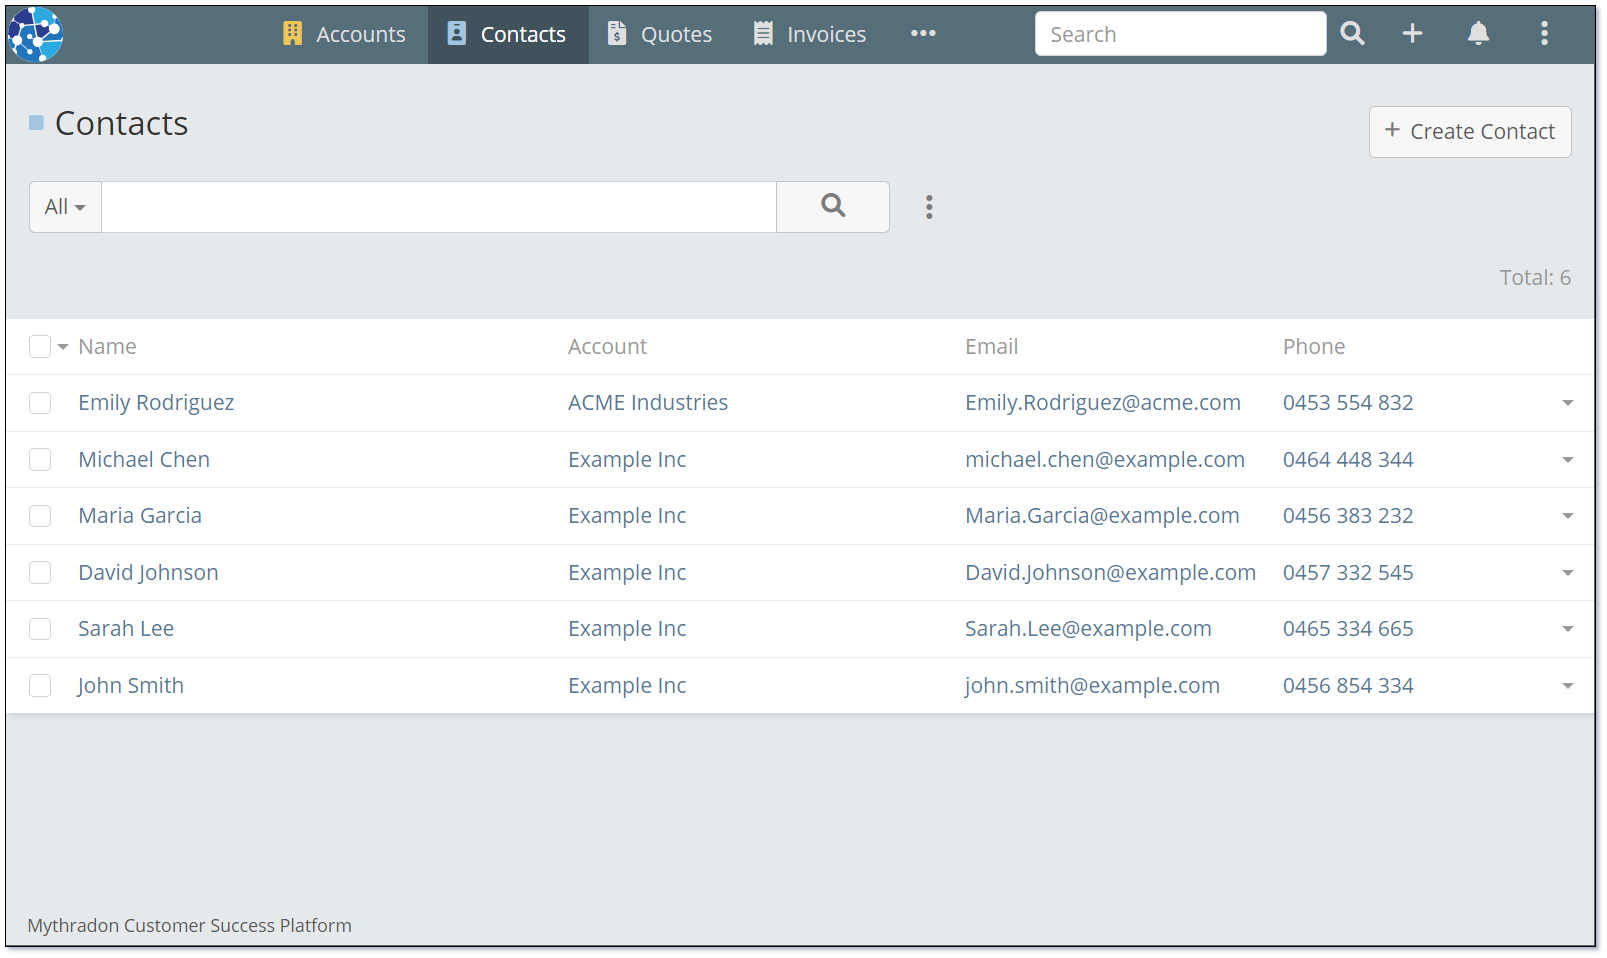
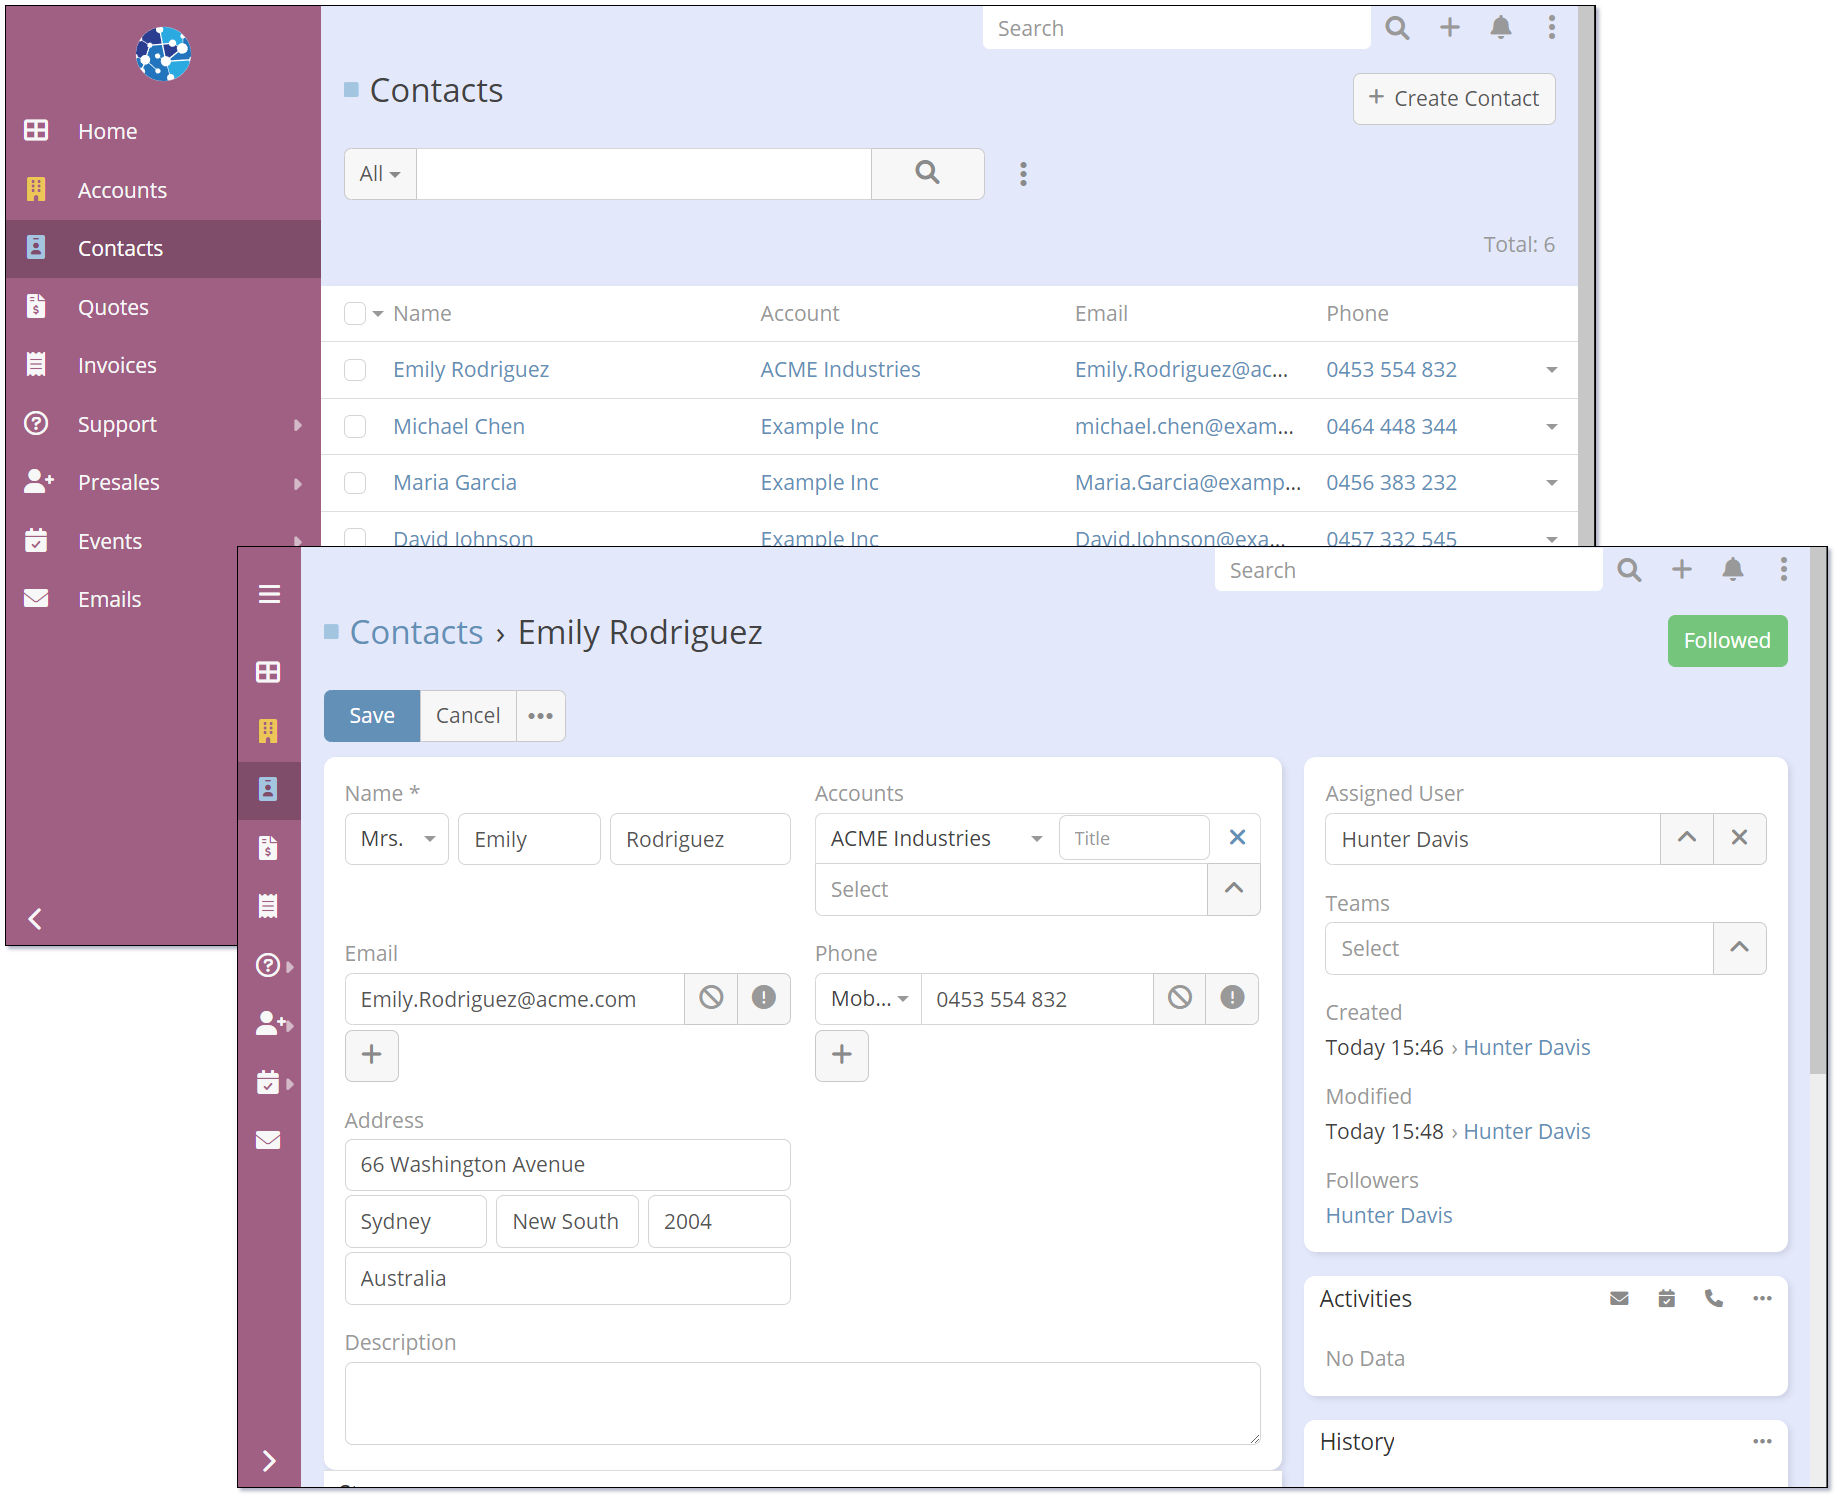
Dark Theme
- Dark Theme with Side Navbar
- Dark Theme with Top Navbar
Classic Theme
- Classic Theme with Side Navbar
- Classic Theme with Top Navbar
Glass Theme
- Glass Theme with Side Navbar

- Glass Theme with Top Navbar
Blue Theme
- Blue Theme with Side Navbar

- Blue Theme with Top Navbar
Sakura Theme
- Sakura Theme with Side Navbar
- Sakura Theme with Top Navbar
Violet Theme
- Violet Theme with Side Navbar
- Violet Theme with Top Navbar
RTL
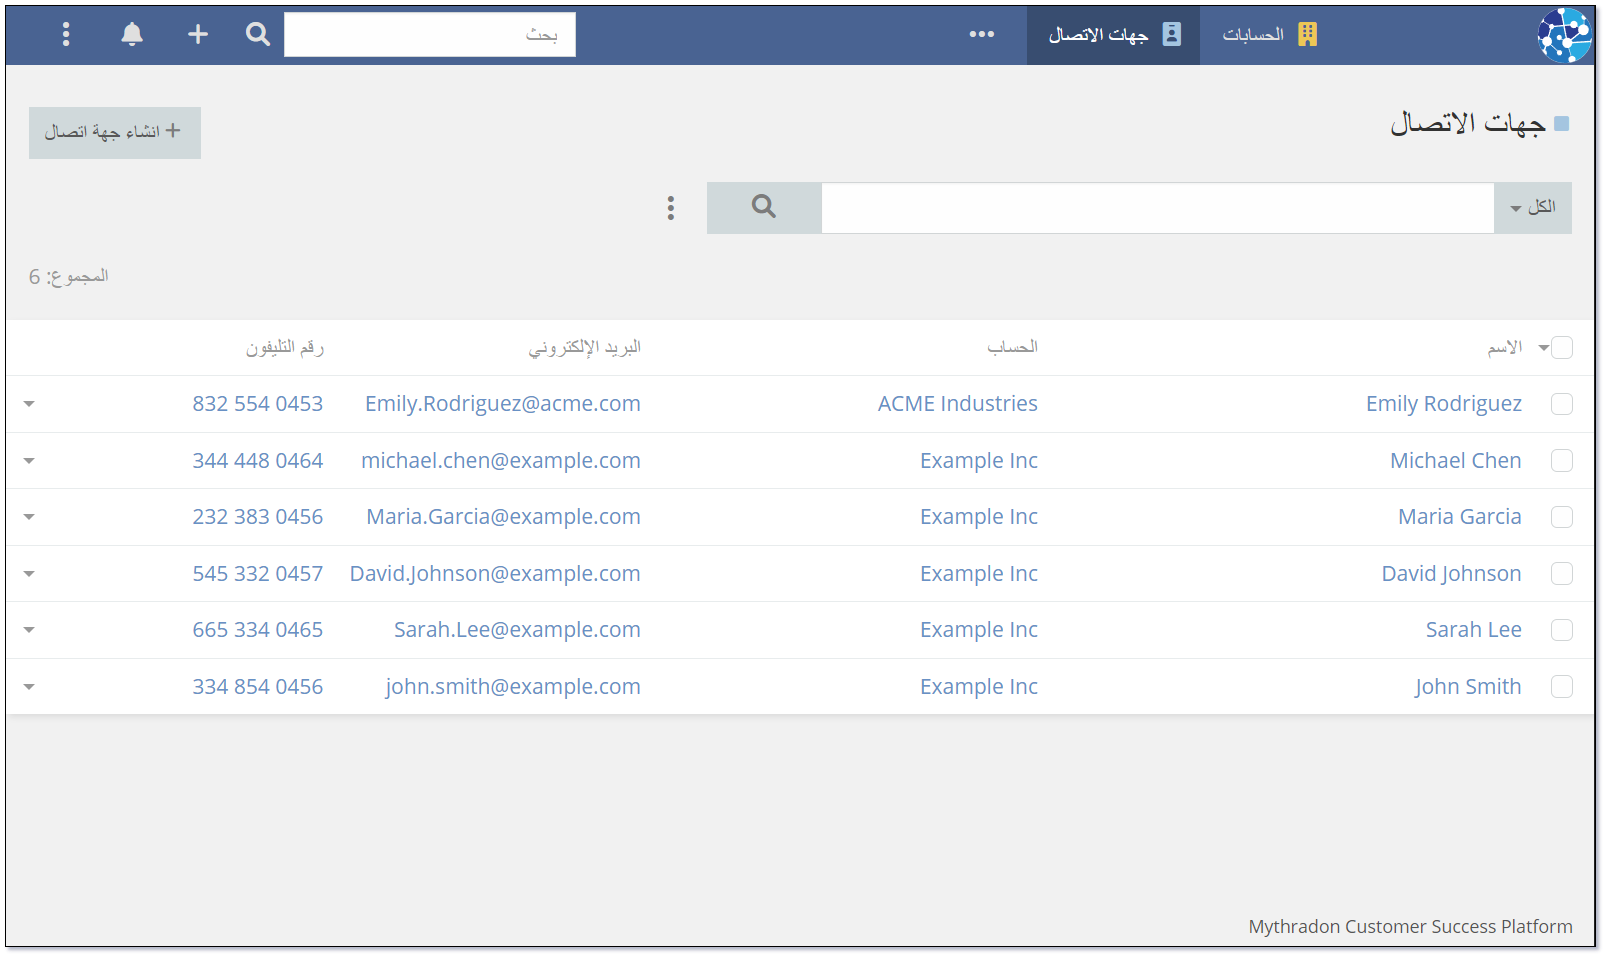
Displays the menu horizontally at the top of the application. Uses Mythradon's Classic colour scheme.
Right To Left mode. Important theme for languages such as:
- Arabic
- Aramaic
- Azeri
- Dhivehi/Maldivian
- Hebrew
- Kurdish (Sorani)
- Persian/Farsi
- Urdu
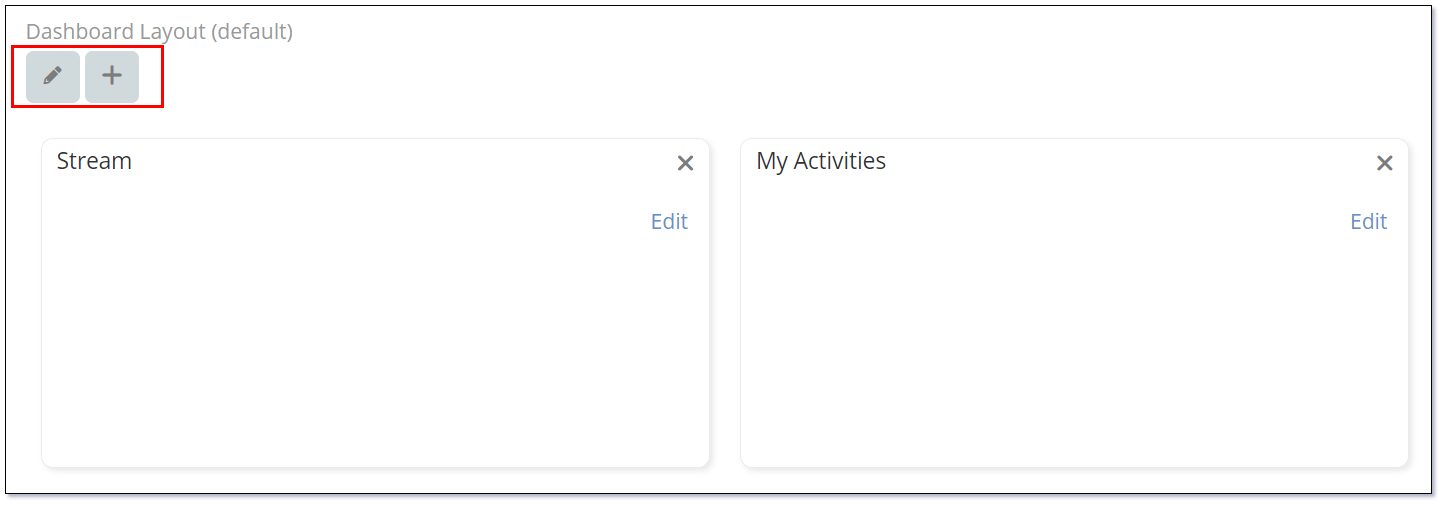
Default Dashboard Layouts
Navigate to the bottom of the User Interface Settings to access the Default Dashboard Layouts. From there, you can set up a default dashboard layout that will be applied to all users.
Use the Pencil and + buttons to add pages and dashlets to the default dashboard.
Refer to Dashboard Setup for further information.
See also
- Mythradon Basics
- Mythradon Marketing
- Mythradon Sales
- Mythradon Service
- Mythradon System Administration
- Mythradon Tools